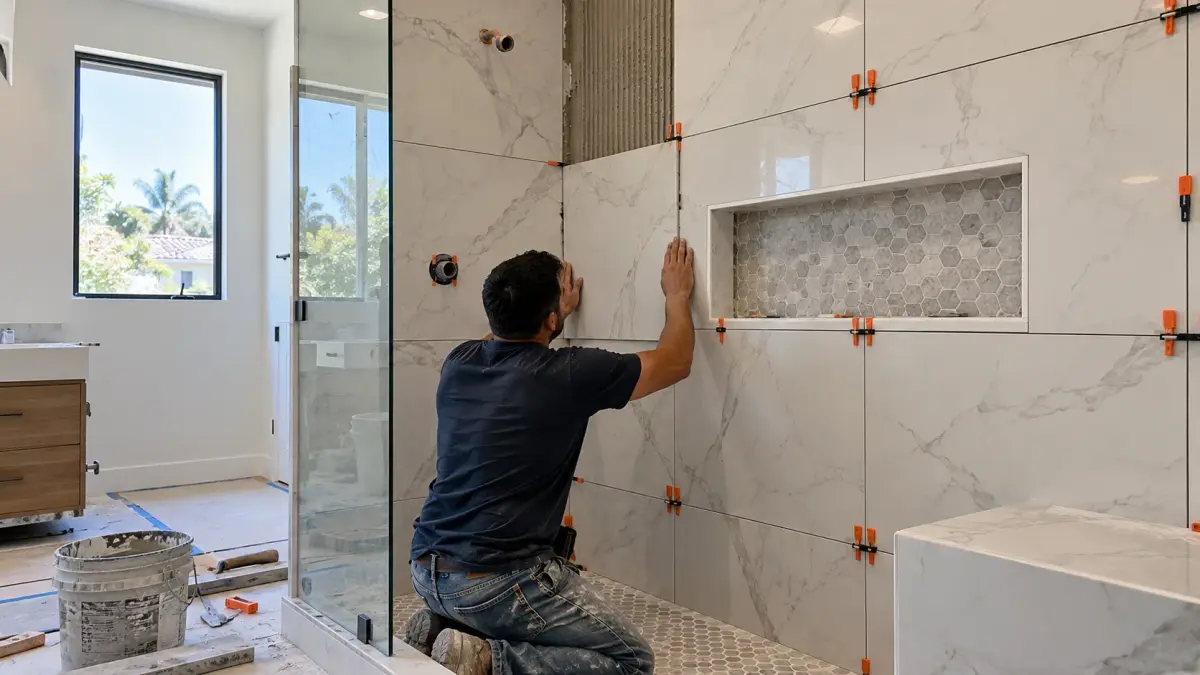
Tile can be beautiful on its own and still look awkward once it is installed.
The difference often comes down to layout.
Where a grout line lands, how a tile meets the edge of a shower niche, whether the first and last pieces are noticeably different sizes, and how the pattern continues around corners can all change the finished appearance of a bathroom.
That is why homeowners should review important tile-layout decisions before permanent installation begins. A bathroom tile dry layout gives the installer and homeowner an opportunity to look at the pattern, important cuts, grout lines, and focal areas before those choices become much harder to change.
For a bathroom renovation in Tarzana, this step can be particularly valuable when the design includes large-format tile, patterned material, niches, benches, multiple surfaces, or other details where alignment is visually noticeable.
Quick Answer: What Is a Bathroom Tile Dry Layout?
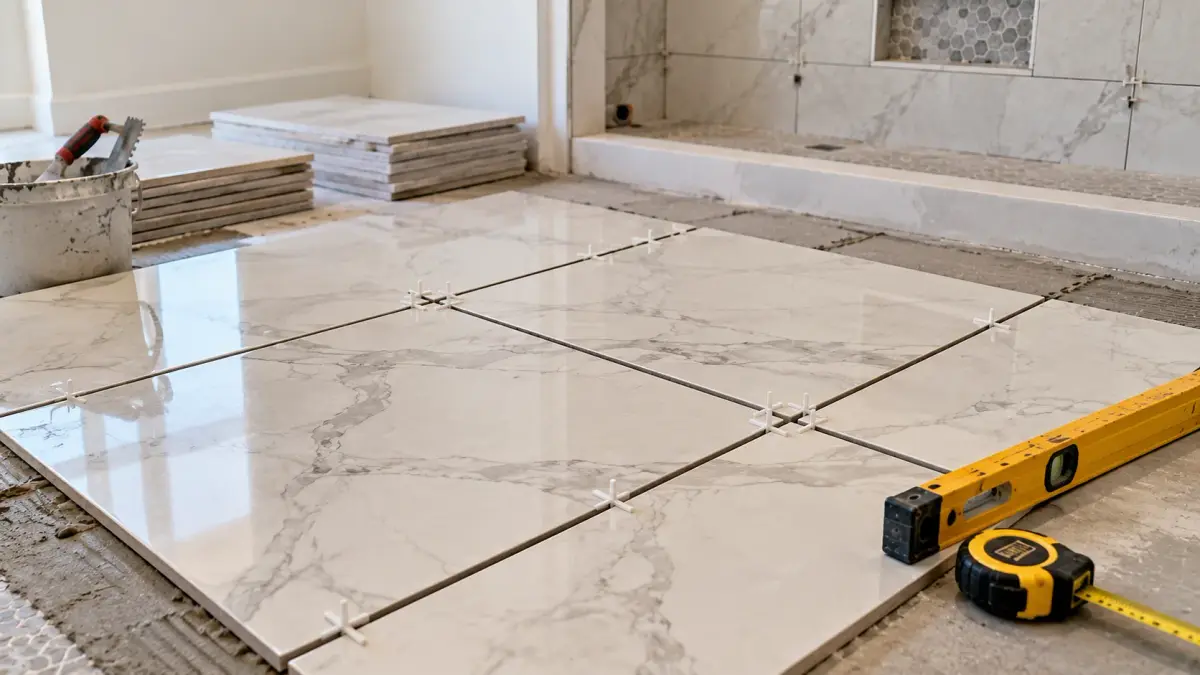
A dry layout is a planning step used to evaluate how tile will be positioned before it is permanently set with mortar.
Depending on the project, tiles may be physically arranged in a representative area, measurements may be transferred to the installation surface, or layout lines may be established to show where full tiles, grout joints, and cuts will fall.
The goal isn’t simply to see whether the tile fits.
It is to answer a more important question:
Will the finished layout look intentional once all of the cuts, grout lines, fixtures, corners, and transitions are visible together?
A useful sequence is:
Measure → Establish layout → Review focal areas → Adjust → Approve → Install
The exact installation method still depends on the tile, substrate, setting materials, manufacturer instructions, and applicable installation requirements.
Why Tile Layout Should Be Decided Before Installation
Bathroom tile involves many individual pieces, but people usually experience the finished surface as one composition.
A small adjustment to the starting position can change where cuts appear across an entire wall or floor.
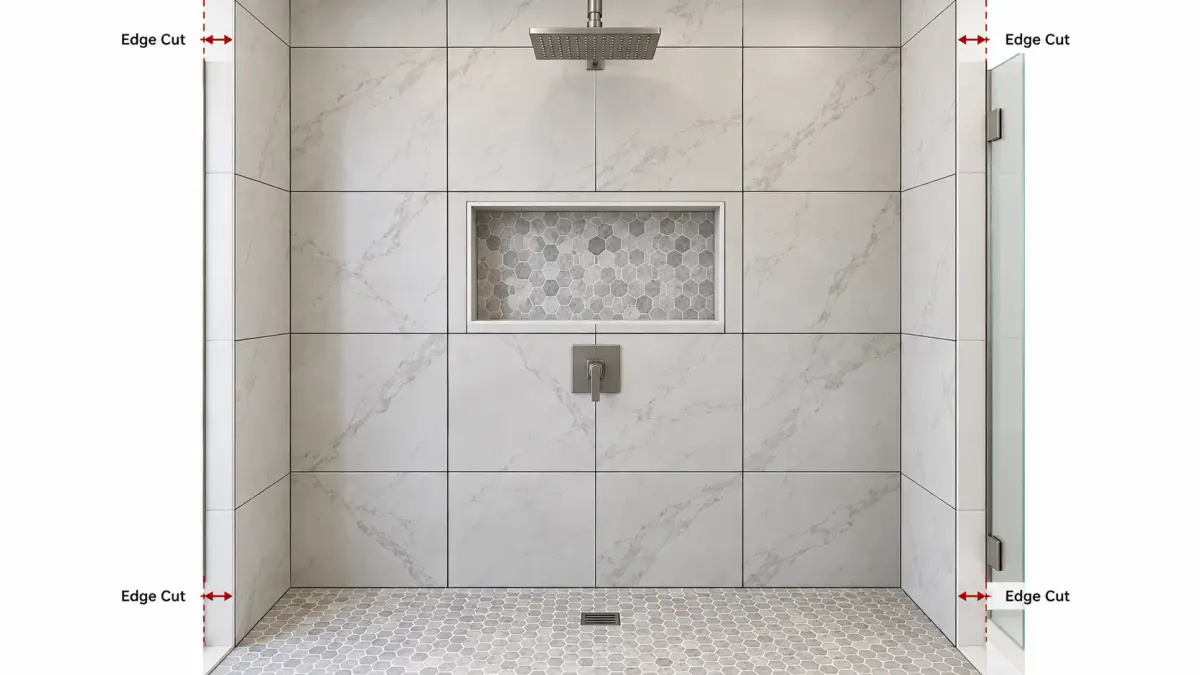
Imagine a shower wall where the proposed layout leaves almost a full tile on the left but a narrow strip on the right. Shifting the starting point may create a more balanced appearance. But that same adjustment could change how the grout joints meet the niche, plumbing fixtures, or adjacent wall.
That is why layout decisions should not be made one edge at a time.
The installer needs to consider the whole visible area.
This is particularly important with larger tiles because fewer grout joints mean individual alignments and cuts can become more noticeable.
Start With the Surfaces People Notice First
Not every tile edge carries the same visual importance.
When someone enters a finished bathroom, the eye is often drawn toward major uninterrupted surfaces, the shower, vanity wall, bathtub area, or another focal feature. Those locations deserve careful layout consideration.
A shower wall, for example, may contain a valve, showerhead, niche, bench, window, or decorative feature. The tile layout has to interact with all of them.
Rather than automatically starting with a full tile at one corner, the layout should be evaluated according to what will actually be visible when the bathroom is complete.
Sometimes centering a pattern makes sense. In another room, adjusting it to avoid an awkward edge cut may produce a better result.
There isn’t one layout rule that solves every bathroom.
Look at the First and Last Tile Cuts Together
One of the most useful things to review before installation is what happens at both ends of a tiled surface.
Suppose a wall cannot accommodate an exact number of full tiles.
Starting with a full tile on one side may leave a noticeably narrow cut at the opposite edge. Changing the starting position can sometimes distribute the cuts more evenly.
But symmetry isn’t automatically the goal either.
One edge might disappear behind a vanity while another remains highly visible. A shower enclosure may cover part of an edge. An outside corner may require a specific finishing detail.
The better question is not simply:
“Are the cuts equal?”
It is:
“Do the visible cuts make sense within the finished room?”
That keeps the layout focused on what the homeowner will actually see.
Grout Lines Should Relate to the Whole Bathroom
Grout joints create a visual grid.
On a floor, that grid can influence how large, narrow, centered, or directional the room appears. On shower walls, grout lines interact with niches, fixtures, benches, windows, and adjacent tiled surfaces.
Before approving a layout, step back and follow those lines visually.
-
Does a prominent vertical grout joint land awkwardly against a plumbing fixture?
-
Does a horizontal joint pass through the niche in a way that looks deliberate?
-
If wall tile continues around a corner, what happens to the pattern?
-
Where floor tile meets the shower, does the change in material feel coordinated?
These questions are easier to discuss before the tile is permanently installed.
Plan the Shower Niche With the Tile, Not Separately
A shower niche may occupy only a small portion of the wall, but it can become one of the most noticeable details in the bathroom.
Its location and dimensions can affect how surrounding tiles are cut.
If the niche is positioned without considering the tile module, the finished wall may require small pieces around its edges or grout lines that appear slightly misaligned.
Ideally, niche dimensions, framing constraints, waterproofing requirements, and tile layout should be considered together.
That does not mean a niche should be moved purely to create a perfect grout pattern. Its location also has to work with the wall structure, plumbing, waterproofing system, and practical use.
The purpose of the layout review is to identify those relationships early enough to make informed decisions.
Example: Large-Format Tile Around a Shower Niche
Consider a shower using large rectangular wall tile with a recessed niche on the main visible wall.
On the drawing, the niche may appear centered.
Once the actual tile dimensions and grout joints are considered, however, the proposed pattern might leave a thin strip immediately above the niche or cause a grout line to miss its edge by a small but noticeable amount.
There may be several possible responses: shift the tile layout, reconsider the niche dimensions where construction conditions allow, or intentionally use a different treatment inside or around the niche.
The right solution depends on the actual bathroom.
What matters is discovering the condition before most of the wall has already been tiled.
Don’t Forget the Plumbing Fixtures
Shower valves, body sprays, tub fillers, wall-mounted faucets, and other penetrations become part of the tile composition.
The tile layout should therefore be reviewed alongside the approved plumbing locations.
A fixture does not always need to sit exactly at the center of a tile. Trying to force every fixture into a mathematically perfect tile position can create problems elsewhere.
Instead, look for awkward conditions.
For example, a circular valve trim positioned extremely close to a grout joint may look different from one intentionally located within a tile field. Moving the tile pattern slightly could improve that condition, but only if doing so does not create a worse cut elsewhere.
This is another reason to evaluate the complete wall instead of one detail at a time.
Floor Tile Needs Its Own Layout Review
Bathroom floors create different challenges from shower walls.
The doorway is particularly important because it is where the bathroom floor meets another finished surface. The tile layout also has to work around the vanity, toilet, bathtub or shower, floor vents where present, and the shape of the room itself.
In an irregular room, simply centering the tile mathematically may not produce the most balanced visual result.
Before installation begins, review where the pattern will be most visible and where cut edges will be concealed by fixtures, cabinetry, trim, or other finishes.
If the bathroom connects to a hallway or bedroom with another flooring material, the transition location should also be established before installation.
Tile Size on the Box Is Not Always the Layout Dimension
One detail homeowners can easily miss is that the name used to describe a tile does not necessarily provide every dimension needed to calculate the finished layout.
Actual tile dimensions, intended grout-joint width, manufacturing variation, pattern, and installation requirements all influence the layout.
The installer should work with the actual material and relevant product information rather than assuming that a nominal tile size will divide perfectly across the room.
This becomes even more important when different tile sizes or materials need to align with one another.
Patterned and Veined Tile Requires Another Level of Review
With plain, relatively uniform tile, layout is largely about proportions, cuts, and grout joints.
With strongly patterned material, there is another consideration: what appears on each individual tile.
Stone-look porcelain, marble, and other visibly veined materials can create unintended clusters or abrupt changes when pieces are installed without considering their appearance together.
Before setting highly variable tile, it can be useful to review multiple pieces and distribute prominent patterns intentionally rather than installing them strictly in the order they come out of the boxes.
For natural stone, variations are part of the material. Reviewing pieces before installation can help decide where particularly distinctive tiles should appear.
Common Tile-Layout Mistakes to Catch Before Installation
A good pre-installation review is often less about finding one “perfect” pattern and more about catching decisions that could become distracting later.
Common issues include starting with a full tile without checking the opposite edge, leaving a conspicuously narrow cut in a highly visible area, ignoring how grout lines meet a niche, and reviewing walls without considering fixtures.
Another mistake is approving a layout from a drawing without checking the actual tile.
Drawings are useful, but the material, field dimensions, grout joints, and finished conditions still need to work together.
Perhaps most importantly, don’t wait until several rows have been installed to decide that the layout should have started differently.
What Should You Approve Before Tile Installation?
Homeowners don’t need to direct every technical aspect of tile installation. The installer should determine appropriate installation procedures based on the project conditions, materials, and applicable requirements.
But there are several visual decisions worth understanding before the work becomes permanent.
Review the primary starting position, prominent edge cuts, grout-line direction, niche treatment, transitions, pattern orientation, and any unusually visible cuts around fixtures.
If the tile has strong color or pattern variation, review that appearance as well.
Photographs or an approved layout drawing can also help document important design decisions before installation continues.
Bathroom Tile Planning During a Tarzana Renovation
Bathrooms in Tarzana vary in size, layout, age, and previous renovation history, so tile decisions should be based on the actual room rather than a standard template.
A bathroom renovation may also involve more than new finishes. Changes to the shower, vanity, plumbing, electrical work, waterproofing, flooring, or walls can all influence where the finished tile surfaces begin and end.
That is why tile selection and tile layout should not be treated as completely separate decisions.
If a shower niche is moving, for example, its final location affects the tile. If a vanity size changes, the visible floor area changes. If plumbing locations change, the relationship between fixtures and grout lines may change too.
Coordinating these decisions as part of the broader bathroom plan can reduce avoidable compromises during installation.
When Should the Homeowner Review the Layout?
The best time is after the necessary dimensions and materials are known but before permanent installation has progressed beyond the point where reasonable adjustments can be made.
For visually important areas, ask to review the proposed arrangement before setting begins.
You do not necessarily need every tile spread across the floor. The appropriate review method depends on the project. What matters is having enough information to understand the pattern, major cuts, grout-line placement, and important focal areas.
If something looks questionable, discuss it then.
A five-minute conversation before installation is much easier than deciding what to do after the mortar has cured.
Good Tile Work Starts Before the First Tile Is Set
The finished bathroom should not look as though the installer simply started at one edge and dealt with each obstacle when it appeared.
Good layout requires looking ahead.
The dimensions of the room, actual tile, grout joints, niches, fixtures, corners, transitions, and focal surfaces all influence the final result.
A dry-layout review gives the project team an opportunity to resolve those relationships before installation makes them difficult to change.
For homeowners, that means fewer surprises and a clearer understanding of what the finished bathroom is intended to look like.
Planning a Bathroom Renovation in Tarzana?
Tile layout is only one part of a bathroom project. Shower construction, waterproofing, plumbing locations, vanity dimensions, lighting, flooring, fixtures, and finish details all need to work together.
If you’re planning a bathroom update in Tarzana, Green Star Remodeling can discuss those elements as part of the overall renovation rather than treating each finish as an isolated decision.
Planning new bathroom tile? Request a free in-home consultation to discuss your bathroom layout, materials, fixtures, and renovation plans before installation begins.
Frequently Asked Questions
Should bathroom tile be dry laid before installation?
A pre-installation layout review can be useful, especially where cuts, patterns, grout lines, niches, fixtures, or transitions are visually important. It does not necessarily mean every tile must be laid out across the room. The appropriate method depends on the material and installation.
Should shower tile be centered on the wall?
Not automatically. Centering may work well in some layouts, but it can create awkward cuts or poor alignment with niches, fixtures, corners, or adjacent walls in others. The entire visible wall should be considered before choosing the starting point.
Should grout lines line up with a shower niche?
Alignment can create a clean appearance, but it isn’t a universal requirement. Niche dimensions, waterproofing, framing, tile size, and the overall wall pattern all affect the decision.
Can tile layout be changed after installation starts?
Minor adjustments may sometimes be possible, depending on how far installation has progressed. Significant layout changes become more difficult once tile has been permanently set, which is why major visual decisions should be reviewed beforehand.
How do you avoid small tile cuts at the edge of a bathroom wall?
The proposed layout can be measured across the complete surface before installation. Adjusting the starting position may produce better edge cuts, but the installer should also consider corners, fixtures, niches, transitions, and other visible conditions before making that change.
Should patterned bathroom tile be laid out before installation?
Reviewing patterned or highly variable tile beforehand can help distribute prominent colors, veining, or repeated designs more intentionally. The appropriate approach depends on the specific material and intended pattern.